
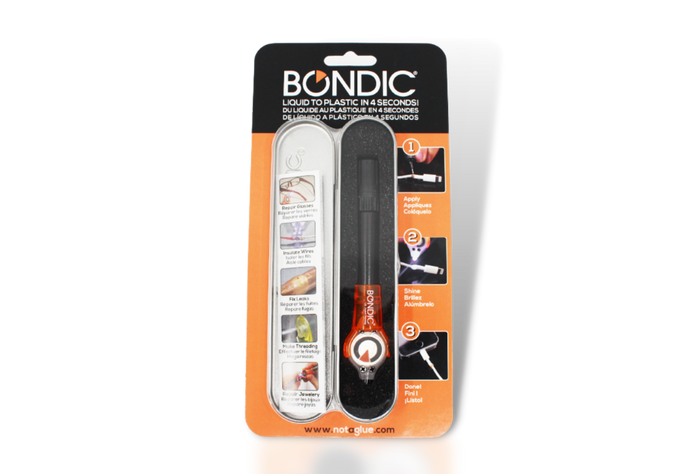

Easy to Use in

Simple Steps
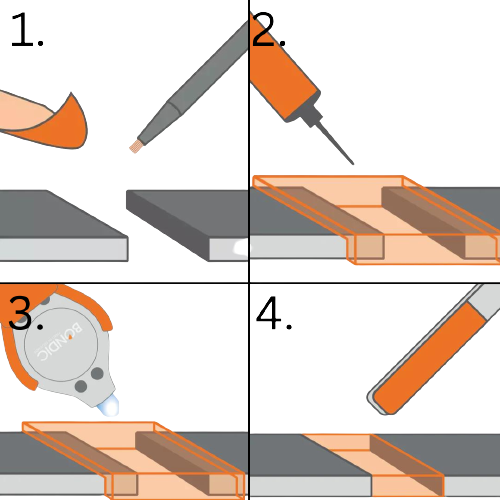
Clean. Fill. Cure. Shape.
Clean the Surface
To ensure a secure hold prepare the surface before applying Bondic®. Ensure all oils are removed from the surface. Rough up the surface with a file or sandpaper. This will create groves and allow the Bondic® Liquid Plastic to fill those groves and create a microscopic mechanical bond with the surface.


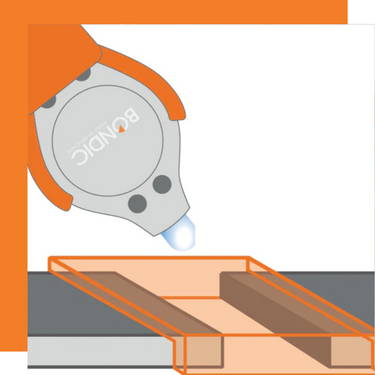
Fill with Bondic®
Apply thin layers of Bondic® Liquid Plastic in the space using the applicator tip. By Applying Bondic® in thin layers, curing then repeating, the hold will become more secure.
Fill with Bondic®
Apply thin layers of Bondic® Liquid Plastic in the space using the applicator tip. By Applying Bondic® in thin layers, curing then repeating, the hold will become more secure.
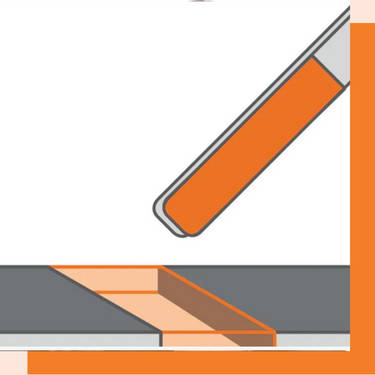
Cure with the LED
After applying the Liquid Bondic® shine the UV Light on the Liquid Plastic. Hold the Light over the Liquid Bondic® for 4 seconds to harden. No pressure is needed, Bondic® doesn't harden with air and pressure like regular glue. Bondic® only hardens under the UV light. Making it special and unique.
Shape to desired Outcome
Use a Shaping tool to file down any unwanted hardened plastic. You can Shape, Paint, Varnish, or Colour the hardened plastic in any way you desire.
SHAPE TO DESIRED OUTCOME
Apply thin layers of Bondic® Liquid Plastic in the space using the applicator tip. By Applying Bondic® in thin layers, curing then repeating, the hold will become more secure.
how to use Bondic®

Create new pieces that are broken or missing

Add textures to models and sculptures

Use a mold and 3D Print a new creation
Bond two pieces together
Fill in gaps and holes with Bondic®
Coat lose or frayed low voltage wires
Bondic® Fixing/Provding Strains Relief
Bondic® Filing Holes or Gopi
Bondic® Binding New Matrial